Would you believe, how to clean a toilet brush and holder is a common question? it is, regardless of whether you are using a silicone toilet brush or even a traditional nylon toilet brush, here’s why!
When we’re bustling around our homes trying to get things tidy, it’s easy to forget about keeping our cleaning gear in top shape. But let me tell you, skipping this step can lead to some seriously unpleasant outcomes! Just picture it: using grimy tools means you’re just spreading more muck and germs around instead of banishing them for good.
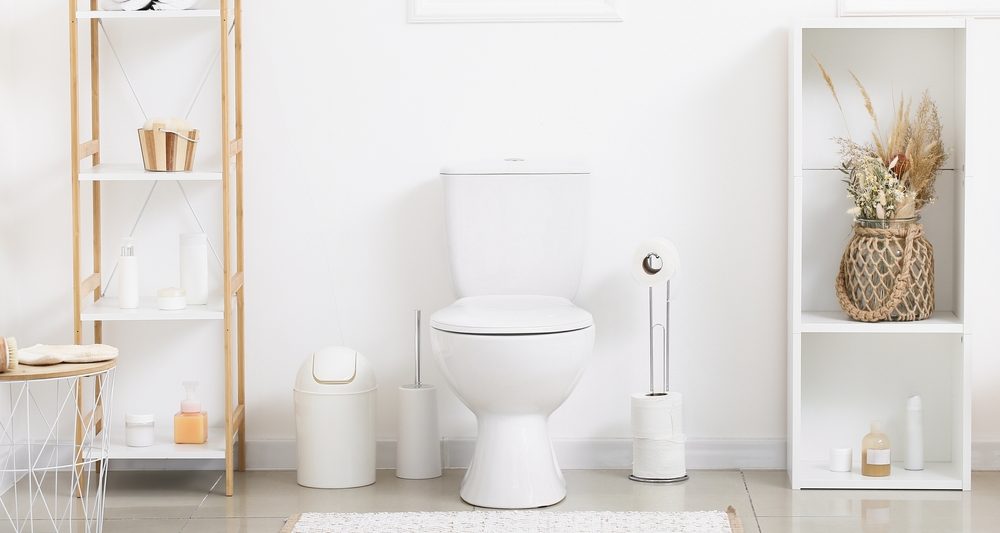
Let’s talk about the unsung hero of bathroom cleaning – the toilet brush with holder! Sure, its main gig is scrubbing the toilet, but that doesn’t mean it gets a free pass on staying clean itself. Sadly, many people overlook this and figure it doesn’t need a good scrub-down. And even if they do think about it, they might not know the best way to do it. Unfortunately, when it comes to the cleaning of toilets, it starts with the toilet brush!
Truth is, with how to clean a toilet brush and holder, toilet brush sets can turn into hotbeds for all sorts of icky bacteria. That’s why it’s crucial to keep them squeaky clean and germ-free. Believe me, putting in the extra elbow grease is totally worth it to keep your bathroom or business from turning into a germ zone!
Table of Contents
How Often to Clean a Toilet Brush and Holder
So, here’s the deal with keeping your toilet brush and holder in tip-top shape: Ideally, you should give them a good clean after every use and hit them with some disinfectant at least once a month. If you’re on top of things and let the brush dry out completely before popping it back in the holder, then you can get away with giving the holder a deep clean just once a month.
But, if you’re not so diligent about cleaning the brush or letting it dry properly each time, then you’ll want to up your game a bit. In that case, it’s a good idea to give the holder a scrub down at least once a week to keep things in check, particularly if the brush and holder is being used in workplaces, such as medical centres or childcares.

Cleaning a Toilet Brush Naturally
Alright, let’s talk about how to give your toilet brush a good clean without reaching for the bleach. First off, give it a rinse in the fresh water that comes into your toilet. Then, sandwich the handle between the bowl and the seat, and spray the bristles with a natural cleaner like vinegar or hydrogen peroxide. Make sure you turn the brush around, so all the bristles get a good scrub, and then just leave it in place to air dry completely. Easy peasy, right? No need for any extra rinsing.
Now, here’s the lowdown on why vinegar is your friend when it comes to cleaning that brush. It can zap away about 90% of bacteria, plus around 80% of viruses and mould. But hey, if you want to be extra sure and get rid of 99.9% of all those nasties, bleach is the way to go. Just a heads-up though: some experts say it’s not the best idea to pour bleach into your toilet bowl since it could mess with the plumbing. Instead, you can bleach your brush in a bucket following these steps I’m about to tell you.
Cleaning Items Required:
| Equipment/Tools | Materials |
| Rubber Gloves | Disinfectant Spray |
| Eye Protection | Chlorine Bleach |
| Plastic Buckets | Hydrogen Peroxide |
| Microwave/Stovetop | Disinfectant Wipes |
| Microfibre Cloth | All-Purpose Cleaner |
Toilet Brush and Holder Cleaning Instructions
Disinfectant Spray Method:
- Start by giving the toilet a flush, then grab that toilet brush and give it a rinse in the water. Hold onto the handle with the brush head right over the toilet bowl.
- Now, it’s time to break out the disinfectant spray or some 3 percent hydrogen peroxide. Give that brush head a good spritz, making sure to cover all sides as you turn it around.
- Next up, grab a disinfectant wipe and give the handle a good wipe-down. Then, grab another wipe and clean both the inside and outside of the holder. Keep those surfaces nice and wet for at least 10 minutes to really get the job done.
- Now, here’s the tricky part: balance the toilet brush handle between the rim of the toilet bowl and the lowered toilet seat to let it dry.
- While that’s drying, grab a microfibre cloth and dry off the holder. And don’t forget to let the brush air-dry completely before popping it back into the holder.
Bleach Soaking Method:
- First things first, let’s get that water nice and hot. You can either heat up several litres of water on the stovetop or zap it in the microwave until it’s boiling.
- Once you’ve got your hot water ready, carefully pour it into a plastic cleaning bucket. Make sure the bucket is big enough to hold the holder, the toilet brush head, and most of the handle, with enough water to cover them.
- Now, here’s a Cleanco Commercial Cleaning top tip: pop that bucket into a larger sink, bathtub, or shower stall. That way, if any bleach solution splashes out, it won’t cause any damage to the surrounding area.
- Time to suit up! Put on those rubber gloves and eye protection before you add one cup of liquid chlorine bleach to the hot water.
- Slowly lower the holder and toilet brush into the bucket to avoid any splashes.
- Let them soak in the bleach solution outside for at least an hour to really get rid of any germs.
- Once they’ve had their soak, put on those rubber gloves again and pull out the brush and holder. Give them a good rinse under hot water for at least 30 seconds to wash away any remaining bleach.
- Lastly, dry them off with a microfibre cloth or just let them air-dry completely before you stash them away.
All Purpose Cleaner Method:
If you’re not a fan of busting out the chlorine bleach, no worries! You can still get your toilet brush and holder nice and clean using an all-purpose cleaner and hot water solution.
Now, here’s the thing: this method will definitely help cut down on the bacteria hanging out on those items, but it won’t completely zap them away like bleach does. Just something to keep in mind if you’re aiming for that super clean, germ-free vibe.
- Let’s mix things up a bit! Start by grabbing a bucket or a big ol’ sink and fill it up with boiling water. Add the amount of all-purpose cleaner or dishwashing liquid recommended on the label of the product.
- Now, it’s time for a little bath for your toilet brush and holder. Plop them in and let them soak for a solid two hours.
- Once they’ve had their soak, slap on those rubber gloves and fish them out. Give each one a good rinse under running hot water for at least 30 seconds to wash away any leftover grime.
- Grab a trusty microfibre cloth and dry off that toilet brush and holder.
- Last step: let the brush air-dry completely before you pop it back into the holder. And there you have it, a fresh and clean toilet brush and holder without a drop of bleach in sight!

When to Call it Quits and Replace Your Toilet Brush
The longevity of a toilet brush is intricately tied to its material composition, build quality, and utilisation frequency. As a rule of thumb, the standard practice entails replacing the toilet brush every six months. Nonetheless, this timeframe can fluctuate significantly. Brushes crafted from premium materials and boasting superior construction may endure for extended periods, whereas those subjected to frequent use in households with high toilet traffic may necessitate swifter replacement intervals. If your goal is to ensure a clean toilet, then adopting a cleaning schedule is the first step, prior to replacing the brush and holder.
Expert Tips to Get Your Toilet Brush and Holder Lasting longer:
- After each use, ensure to rinse the toilet brush thoroughly in clean flush water to prevent discoloration.
- Prior to storage, allow the brush to air-dry completely to mitigate moisture retention.
- Avoid the accumulation of bacteria-laden water by promptly emptying and cleaning the holder regularly.
- Opt for a holder design that elevates the brush head from the bottom to prevent bending or breakage of bristles.